- Continue Shopping
- Your Cart is Empty
Summer Workshops
School's out and summer is here! We have a full summer planned of workshops and events. Here's what our schedule looks like so far:
July 15 - Doodling Robots at the Ottawa Public Library, Beaverbrook Center
July 15 - Doodling Robots at the Ottawa Public Library, Emerald Plaza Branch
July 16 - Break & Make at the Ottawa Public Library, Elmvale Acres Branch
July 16 - Break & Make at the Ottawa Public Library, Main Branch
July 17 - Electro-cards at the Ottawa Public Library, Carlingwood Branch
July 17 - Soft Circuits at the Ottawa Public Library, Hazeldean Branch
July 23 - Doodling Robots at the Ottawa Public Library, North Gower Branch
July 24 - Doodling Robots and Break & Make at the North Grenville Public Library
July 28 - Aug 1 - Summer Camp at the Studio Cafe
August 5 - Doodlebots & Electro-cards at the Meaford Public Library
August 7 - Electro-cards at the Bruce County Public Library, Tara Branch
August 7 - Duct Tape at the Bruce County Public Library, Port Elgin Branch
August 7 - Electro-cards at the Bruce County Public Library, Chesley Branch
August 8 - Duct Tape at the Bruce County Public Library, Lucknow Branch
August 8 - Electro-cards at the Bruce County Public Library, Teeswater Branch
August 8 - Electro-cards at the Bruce County Public Library, Walkerton Branch
August 9 - Electro-cards & Doodlebots at the Owen Sound & North Grey Union Public Library
August 12 - Quiz Cards at the Ottawa Public Library, Orleans Branch
August 13 - Electro-cards at the Ottawa Public Library, Rosemount Branch
August 13 - Soft Circuits at the Ottawa Public Library, Sunnyside Branch
August 14 - Quiz Cards at the Ottawa Public Library, Manotick Branch
August 18 - Electro-cards at the Petawawa Public Library
August 19 - Doodlebots at the Perth & District Union Public Library
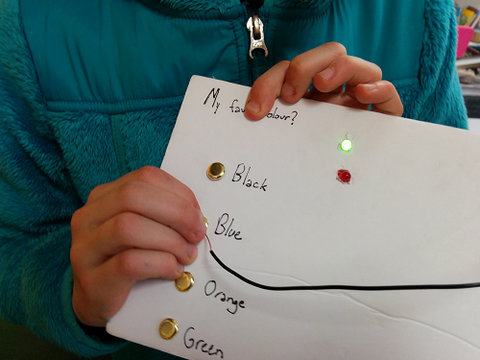
Quiz Cards with red and green LED's
Every time I do a quiz card workshop, somebody always asks for red LED's. Usually, we use green LED's. That way, when you are playing the game and pick the right answer, the green light goes on. I like this version. It's easy and fun to change the "right" answer to trick the people you're playing with. But when I run the workshop, there are always a few kids who ask for red LED's, too. They want the green light to go on when the answer is correct, but they also want a red LED to go on when the answer is wrong. Usually I bring a couple of red LED's and leave them as a challenge. The last time I visited the Rainbow Eggheads , I did promise to send them a picture of a quiz card circuit with a red and a green LED. They're a savvy group - I'll post it here instead.
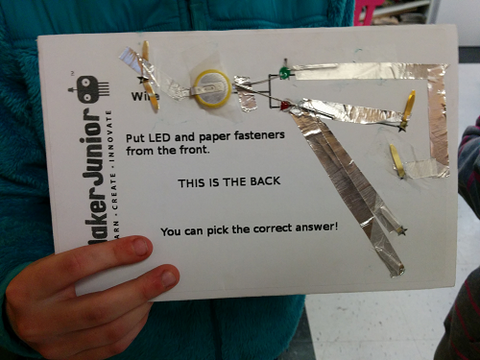
We had worked with the green-light quiz card in the winter session of the Inventors' Workshop and quite a few of them had asked me about adding red LED's. One of the biggest challenges with the quiz cards is knotting the conductive thread through the hole in the tabbed battery. Wrapping the thread around the paper fasteners is easy, but connecting it to the battery is hard. I thought it was time to try out some of the conductive foil tapes. So I used a roll of aluminum conductive foil tape and some red LED's from Newark Electronics/ element 14 .
The tape was fun to work with. But everything has it's own challenges! We had to make sure there was always a good connection between the tape and the component, so we wrapped the tape around the paper fasteners and battery terminals. It was easy to stick down the LED legs with the tape. One of our inventors came up with a new way to fasten the LED to the card and we all liked it so much we started using it.

So now we know how to make Quiz Cards with both red and green LED's. I do like the green LED circuit, it's easier to put together when you're learning. I think what I'll do is modify my Quiz Card circuit so that it is easier to see how to add the red LED's in. I'll continue to start the workshops with the green LED's, and once that's working, I'll leave the red LED's as a challenge. It's always easier to get things working one step at a time!
Spring 2014 Workshops
Our Spring Workshops are set up and ready to go! Workshops will be held at the Glen Cairn Community Centre in Kanata and new this session we will have workshops in Hintonburg at The Studio Cafe.
Kanata
Maker Junior Spring Series 2014 - Kanata
Sign up for the series to attend all three Maker Junior workshops scheduled for this Spring and save $15.00. Register online at Eventbrite.
April 22: Break and Make
Learn how something works by taking it apart. Use the parts to build your own 2D/3D creation. Register online at Eventbrite.
May 13: Talking Stuffie
Use a voice recorder circuit to make a talking stuffie that records the sound of your own voice. Register online at Eventbrite.

June 17: Learn to Solder (Parent & Child)
Parent and Child work together to make flashing badges that really light up! Tools will be provided. Register online at Eventbrite.
Hintonburg
Maker Junior Spring Series 2014 - Hintonburg
Sign up for the series to attend both Maker Junior workshops scheduled for this Spring and save $10.00. Register online at Eventbrite.
May 10: Motors and Movement
Work with DC motors to learn how vibration creates motion. Create doodling robots and origami buzz bots. Register online at Eventbrite.

May 24: Break and Make
Learn how something works by taking it apart. Use the parts to build your own 2D/3D creation. Register online at Eventbrite.
Bring on the Doodle Bots!

The kids and I had a very doodly March Break. We had several events planned and the doodle bots were the activity of choice. It's a good activity for mixed age groups and is always a lot of fun.
We held two workshops in Lombardy and Elgin for the Rideau Lakes Library. We were part of their Mighty Mini Makers! program. At each workshop we built some Electro-cards and made doodle bots as the paint was drying. The Electro-cards are always fun. Theme of the day was hockey nets. Libraries are our favourite places and we always love being asked to come work in one. Kids love being encouraged to doodle and get creative in the library. In the words of one participant, this workshop was "AWESOME!".
Our next event was the Lanark Community Programs March Break day camp. We had loads of fun building doodle bots with both staff and campers. The campers showed great focus and engagement when working on their doodle bots. The Camp Director said it was the highlight of their week.
Our Maker Junior workshop was engaging, educational and fun for kids and adults. It was the highlight of our march break day camp.
- Andrew Sauvé, Camp Director, Lanark Community Programs
Andrew had come up with some great games to play with the doodle bots once they were made. I really liked the Sumo inspired game. Very simple and fun to play!
Thanks to everyone who participated in our workshops. It is always a treat for us to meet with so many fun and creative people.

I did what I wanted to do - success!
A while back I was invited to a meeting of the 113th Ottawa Girl Guides. Their leader thought they would enjoy making some doodling robots. We covered a couple of tables in brown paper and spread out some basic supplies like duct tape and scissors. Without showing them a sample, I handed out cups, markers, motors, batteries, wire and corks and I issued them a challenge. I told them they had everything they needed to make a robot that doodled. At first, they didn't quite believe me. Before we sat down I had shown them how to hook up the wires to the motor and make a circuit with the battery. Now it was time to try it themselves.
Girl Guides are girls in grades 4 - 6. The 113th are the local troop, meaning most of these girls are in school with my sons. It was fun to spend some with them and watch them work. And they did such a great job! I saw lots of great thinking and new ideas.
One girl flipped up the bottom of her cup to make a face:

Another girl took the time to work out some plans on the paper before she began:

As the evening went on, lots of girls began experimenting with what was used to offset the motor. Some girls started using electrical tape. One girl started making something a little more elaborate:

Every robot was unique. And they all doodled. I loved seeing all the different designs they came up with. And I loved hearing this most of all. (Make sure you've got your sound on to hear this!)
Do you like pizza?

I've been making a lot of Quiz Cards lately. I ran two workshops last week where we made them. It's a simple project. I use tabbed coin cell batteries, LEDs, and foam core. To connect the components and make the circuits I've been using brass paper fasteners and conductive thread. It's a bit tricky to "see" the circuit for beginners because it covers both the front and back of the board. But it doesn't take long to explore and discover that you can change the "right" answer, you can add more answers, or you can even make all the answers light up!... Continue Reading
View full article →Inventors' Workshop
I am very excited about the Inventors' Workshop I'm leading this winter with the Glebe Neighbourhood Activies Group (GNAG). The workshop will be held Winter 2014, Mondays from 4:00 – 5:15pm from Jan 6 to March 17. It's a nine-week workshop where we will be learning about some different technical tools, creating several different projects, and working on our own inventions!
The workshop starts off with exploring motors and movement, looking at different motors and how we can get our creations to "move".
In the following weeks we'll look at basic circuits and some alternative materials, like conductive paint and conductive thread, to make greeting cards and quiz games that light up using LEDs and batteries.

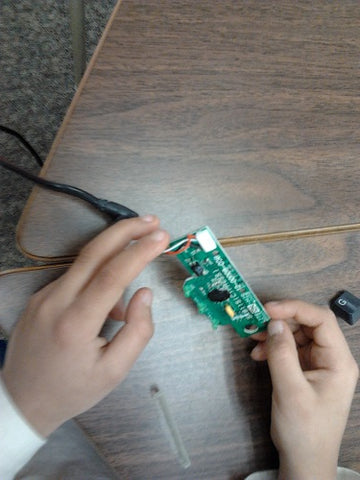
Then we'll take apart some consumer electronics to see what's going on inside.

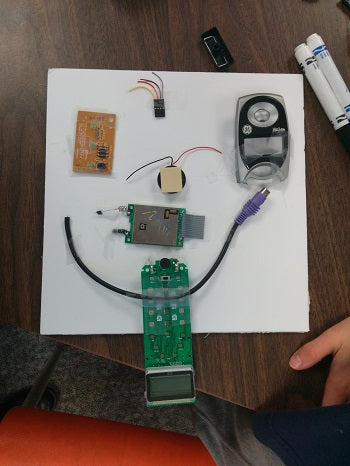
We're going to explore PCB's a little more closely. We're even going to learn how to solder.

Throughout the workshop, we'll be writing down ideas in our Inventors' Notebooks. In the last couple of weeks, each student will be working on their own inventions based on the projects we have previously worked on.
If you have any questions, please don't hesitate to contact me! Registration opens December 12.
Break and Make Workshop
One of my favourite workshops is the Break and Make. The title here explains it all. First, we "break". We put our safety glasses on, I hand out some basic consumer electronics, and away we go.
A successful Break and Make requires some prep work ahead of time. Before the workshop starts I take the time to:
- Look at every item we're going to "break" and make sure the screws will turn
- Cut off power cords and remove any batteries
- Start anything that needs to be pried open or needs special tools
- Package each item with the screwdriver they will need to get started
My goal is for the kids to be successful as they start to take things apart. I always pack a box of extra tools they'll need as they work their way in, but I make sure they can get started right away.
Safety first! Safety glasses go on before the packages are handed out. And safety glasses must stay on! It's hard to resist "prying" and those eyes need to be covered! Even if they are wearing glasses, safety glasses are a must. You'll feel much better when those keys start flying off the keyboards.
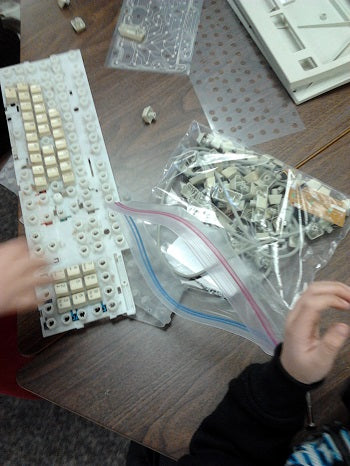
Good items to take apart are ones you use every day. Radios. Hair dryers. Keyboards are easy and very satisfying for the younger kids. Some electronics are not safe to take apart – TV's, monitors, anything that could shatter or hold a charge. As the kids are working, stop by and talk about what they're seeing. Ask questions – what could this do? What is this for?
Some kids will need encouragement to keep going. Some kids will be worried about "breaking" the item beyond repair. Others will take the "breaking" very literally. No – I don't take hammers to a Break and Make! Be prepared to step in and help when screws are tight or difficult to find.
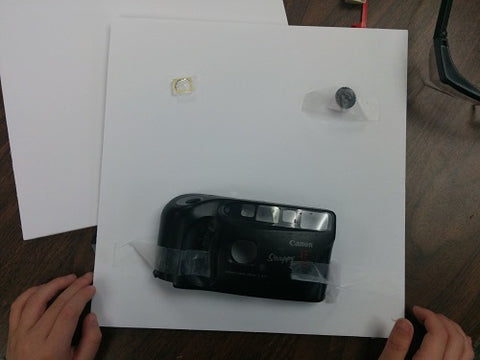
Once we get everything mostly apart, it's time to start the art. I hand out pieces of foam core. I usually cut a full size poster board into smaller pieces. Heavy cardboard works too. You need something stiff to hold the heavier pieces and a lot of the pieces can actually be poked through the board.

The usual craft supplies are important – tape, markers, scissors, glue. I always take a couple of different types of glue and a hot glue gun. Tape and a glue stick will work for the majority of the artwork, but hot glue will stick a heavier item down without an extended dry time.
Resist the temptation to remove safety glasses! If someone is still taking apart or cutting, everyone needs to be wearing safety glasses.
Have fun! This is about exploration and play with learning along the way. It's okay if something breaks, that's the point.
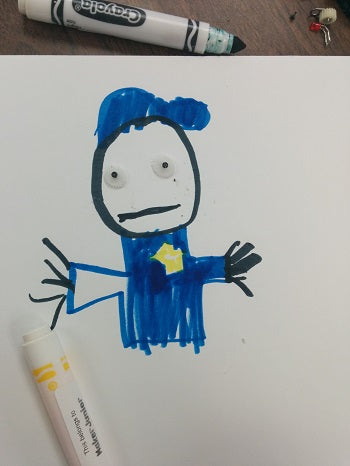
Thanks to the Dunlop PS Primary Maker Club for the great art!
Motors and Movement Workshop - September 2013
September's Motors and Movement workshop was lots of fun. We used DC motors to build doodling robots and vibration motors to build Gami-Bots .

We used corks to offset the motors of the doodling robots and make them vibrate and draw. We explored different ways of causing the vibrations that got the cup to move.

It was fun to decorate them and see everything move around.

The Gami-Bots were fun too. The vibration motors work the same way as our doodling robot offset motors work but you don't have to fiddle around with a cork to get them vibrating, the offset weight is already attached. The trick with the Gami-Bots is balancing the motor and the battery so they don't nose dive. Once we had that figured out they moved really fast and we had to work hard to keep them on the table!
Don't forget to register for our next class, Break and Make , on October 22!