- Continue Shopping
- Your Cart is Empty
Eureka! See what we've made this summer
 We've had a busy summer so far giving workshops in libraries as part of the
Eureka! TD Summer Reading Club
. We're not done yet! We have more to go - but we thought it would be great to share what we've made so far. Check our
schedule
to find a workshop near you.
We've had a busy summer so far giving workshops in libraries as part of the
Eureka! TD Summer Reading Club
. We're not done yet! We have more to go - but we thought it would be great to share what we've made so far. Check our
schedule
to find a workshop near you.
Quiz Cards with red and green LED's
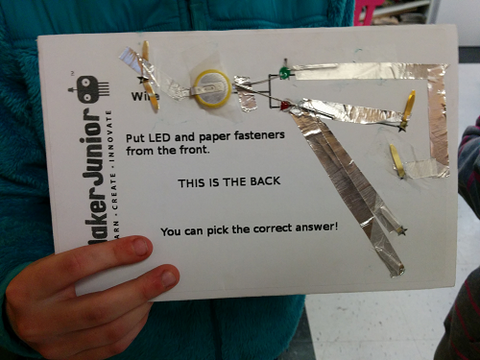
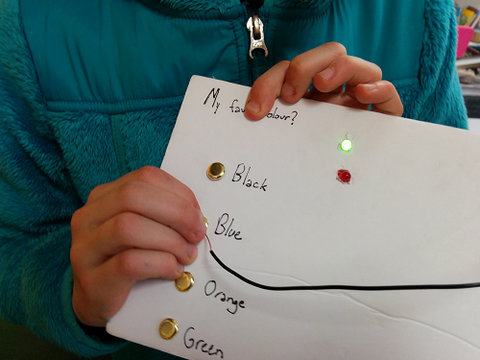
Every time I do a quiz card workshop, somebody always asks for red LED's. Usually, we use green LED's. That way, when you are playing the game and pick the right answer, the green light goes on. I like this version. It's easy and fun to change the "right" answer to trick the people you're playing with. But when I run the workshop, there are always a few kids who ask for red LED's, too. They want the green light to go on when the answer is correct, but they also want a red LED to go on when the answer is wrong. Usually I bring a couple of red LED's and leave them as a challenge. The last time I visited the Rainbow Eggheads , I did promise to send them a picture of a quiz card circuit with a red and a green LED. They're a savvy group - I'll post it here instead.
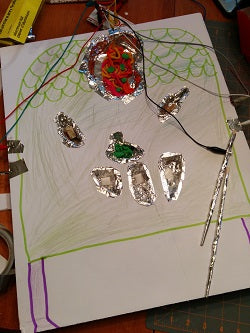
We had worked with the green-light quiz card in the winter session of the Inventors' Workshop and quite a few of them had asked me about adding red LED's. One of the biggest challenges with the quiz cards is knotting the conductive thread through the hole in the tabbed battery. Wrapping the thread around the paper fasteners is easy, but connecting it to the battery is hard. I thought it was time to try out some of the conductive foil tapes. So I used a roll of aluminum conductive foil tape and some red LED's from Newark Electronics/ element 14 .
The tape was fun to work with. But everything has it's own challenges! We had to make sure there was always a good connection between the tape and the component, so we wrapped the tape around the paper fasteners and battery terminals. It was easy to stick down the LED legs with the tape. One of our inventors came up with a new way to fasten the LED to the card and we all liked it so much we started using it.

So now we know how to make Quiz Cards with both red and green LED's. I do like the green LED circuit, it's easier to put together when you're learning. I think what I'll do is modify my Quiz Card circuit so that it is easier to see how to add the red LED's in. I'll continue to start the workshops with the green LED's, and once that's working, I'll leave the red LED's as a challenge. It's always easier to get things working one step at a time!
Break and Make Workshop
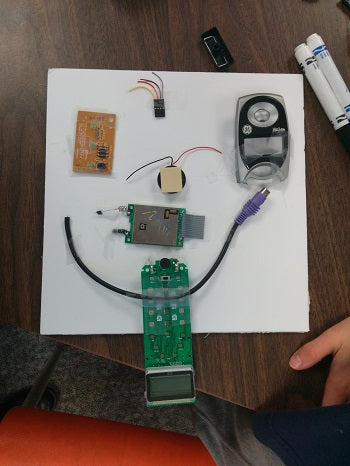
One of my favourite workshops is the Break and Make. The title here explains it all. First, we "break". We put our safety glasses on, I hand out some basic consumer electronics, and away we go.
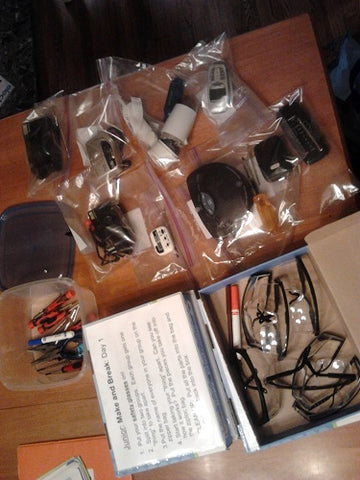
A successful Break and Make requires some prep work ahead of time. Before the workshop starts I take the time to:
- Look at every item we're going to "break" and make sure the screws will turn
- Cut off power cords and remove any batteries
- Start anything that needs to be pried open or needs special tools
- Package each item with the screwdriver they will need to get started
My goal is for the kids to be successful as they start to take things apart. I always pack a box of extra tools they'll need as they work their way in, but I make sure they can get started right away.
Safety first! Safety glasses go on before the packages are handed out. And safety glasses must stay on! It's hard to resist "prying" and those eyes need to be covered! Even if they are wearing glasses, safety glasses are a must. You'll feel much better when those keys start flying off the keyboards.
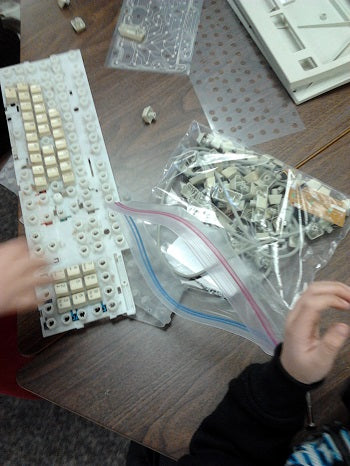
Good items to take apart are ones you use every day. Radios. Hair dryers. Keyboards are easy and very satisfying for the younger kids. Some electronics are not safe to take apart – TV's, monitors, anything that could shatter or hold a charge. As the kids are working, stop by and talk about what they're seeing. Ask questions – what could this do? What is this for?
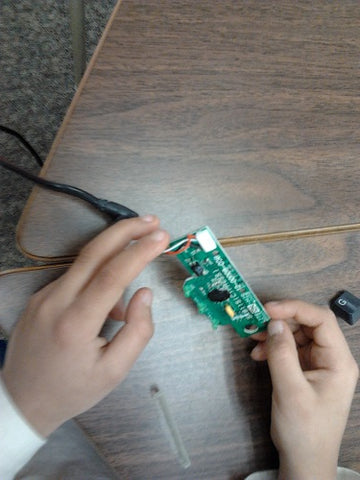
Some kids will need encouragement to keep going. Some kids will be worried about "breaking" the item beyond repair. Others will take the "breaking" very literally. No – I don't take hammers to a Break and Make! Be prepared to step in and help when screws are tight or difficult to find.
Once we get everything mostly apart, it's time to start the art. I hand out pieces of foam core. I usually cut a full size poster board into smaller pieces. Heavy cardboard works too. You need something stiff to hold the heavier pieces and a lot of the pieces can actually be poked through the board.

The usual craft supplies are important – tape, markers, scissors, glue. I always take a couple of different types of glue and a hot glue gun. Tape and a glue stick will work for the majority of the artwork, but hot glue will stick a heavier item down without an extended dry time.
Resist the temptation to remove safety glasses! If someone is still taking apart or cutting, everyone needs to be wearing safety glasses.
Have fun! This is about exploration and play with learning along the way. It's okay if something breaks, that's the point.
Thanks to the Dunlop PS Primary Maker Club for the great art!
Projects for Kids at Maker Faire 2013 - New York
( More on Maker Faire at Maker Junior at Maker Faire 2013 - New York )
There were over 650 exhibitors at the Maker Faire in New York City. Many thanks to Jeff at Stem Design Labs for helping out at the booth so I could get away.
The Maker Junior booth was in the Young Maker's tent. Around us were lots of schools demonstrating what their students were doing. The United Nations International School is a private school in New York that has a maker space called the CoLaboratory. They were showing some cardboard quiz games that I really liked.

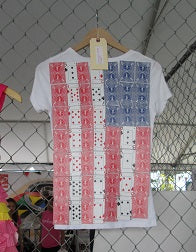
In the booth behind us, the Marymount School was displaying some student projects that included clothing made from recycled materials. Take a close look at this project to see what the flag is made from.
Farther back in the tent was the Brooklyn Robot Foundry. They have afterschool classes, summer sessions and birthday parties for kids to build robots. This robot, that was built at one of their summer sessions, gives free hugs!

My son and I also had a chance to talk with Mike Carroll, who's created a character and written a book about Dewey Mac, a 12-yr old detective who creates gadgets. Mike was giving away Dewey Mac's Lie Detector kits. You can be sure we're going to try this out.

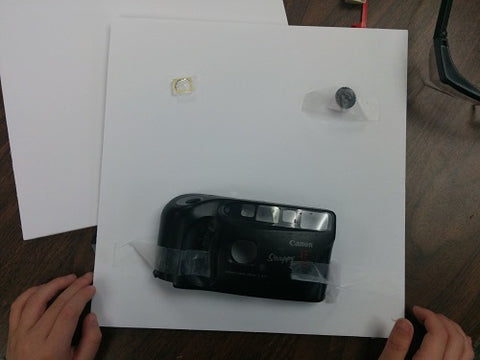
Another booth we really liked was TakeItApart from Rochester, NY. Have you ever seen the prism from inside a camera before? I've got an old film camera that we'll be taking apart at our Break and Make class on October 22.

We are also looking forward to playing around with some Duct Tape Bling. I found some tie-dyed patterned duct tape so we're ready to go.

This is only a small part of what there was available to see and make at the Faire. You could make LED Pinnies at the Make booth or a marshmallow gun out of PVC piping. There was a fantastic Iron Man costume, Spin Bots, Little Bits workshops, sewing, woodworking, welding, and coffee pouring robots. We even saw a golf club that was turned into an electric guitar. It was inspiring to walk around and see the creativity and imagination at work. It's worth taking the time to find out if there is a Maker Faire happening near you!
Soft Circuit Prototypes
I've mentioned conductive paint before, but did you know there's conductive thread too?
E-textiles have been around for a while. Leah Buechley, an associate professor at MIT and director of the High-Low Tech Group, is a leading expert in this area and has developed the super-cool Lilypad Arduino toolkit. She's got a great tutorial online using basic components and I thought I'd give it a try.
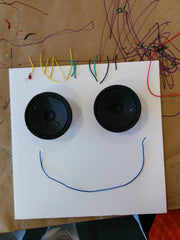
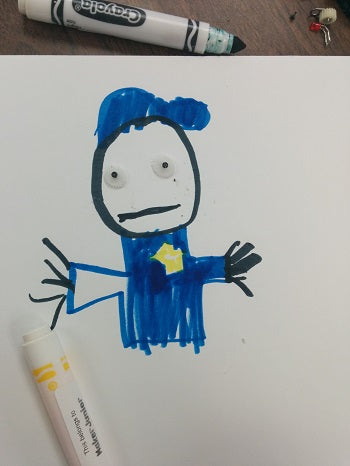
I made this robot using a snap as a switch.

And my favourite – the component dude/tte! This was made by my 11-year old helper. The hook and eye works really well as a switch for this example, and the battery is hidden behind the figure.

Next step, finding more kids to try this out with. I wonder what they'll make?